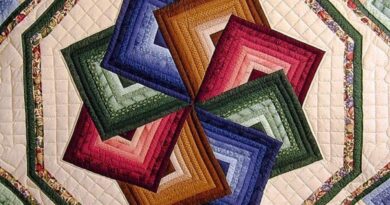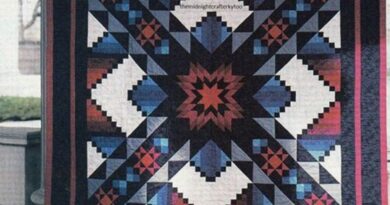
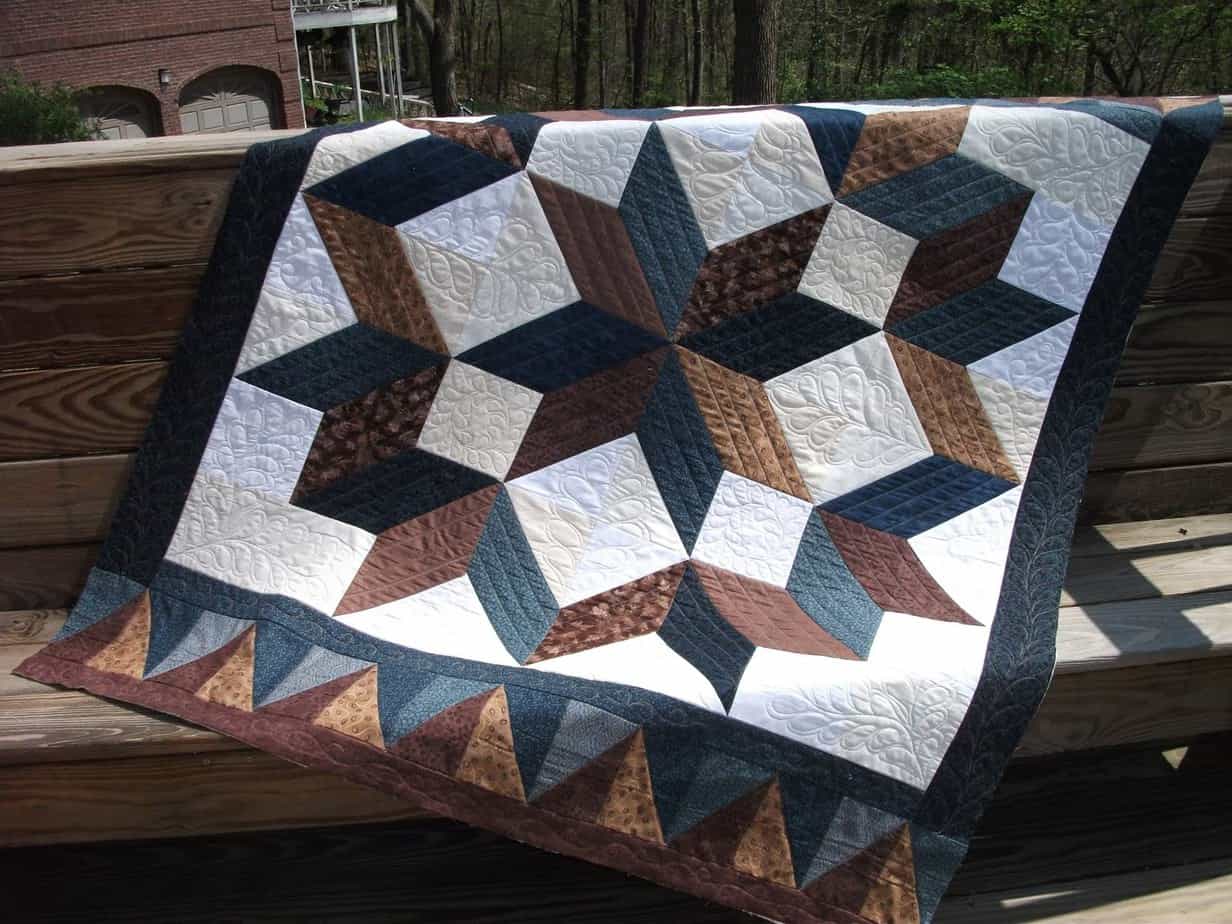
Carpentry Star Quilt Pattern Free
Hello beloveds and beloveds welcome to Crafts Mommy, what a joy to talk to you and today we are going to talk about a beautiful project, Carpentry Star Quilts are perfect for those who love to create beautiful quilts but don’t have much time or experience. In this tutorial, we’ll show you how to make one using our easy step by step instructions.This project is great for beginners because it requires no sewing machine. It’s also a good choice for people who enjoy creating unique pieces of art.
Download the pattern from our website.
We’ve included detailed instructions with each step so you can easily follow along. You will need an 8″ x 8″ square piece of fabric for the star shape and two 12″ squares for the background. The Carpenter Star Quilt Pattern Free is one of the most popular patterns we offer at Craftsy.com. In fact, it’s been downloaded over 1 million times since we first published it in. The Carpenter Star Quilting Pattern Free is a classic block design that features stars, triangles, and circles. It makes a beautiful wall hanging, table runner, or bedspread. You’ll find instructions for making the blocks in the video tutorial below. The Carpenter Star Quilt Pattern Free is one of the most popular patterns we’ve ever offered. In fact, it’s been downloaded nearly 1 million times since we first published it in
Sew them together.
Start by sewing the center of the star block. This is where the points of the star will go. Make sure to sew through both layers of fabric.
Once you have sewn the center of the star, cut off one side of each square. You should now have four squares. Next, sew two of the squares together at the top edge. Repeat this step until you have eight blocks.
The final step is sewing the blocks together into a star shape. Start by placing the first block right sides together with the second block. Pin the edges together and stitch around the outside perimeter of the block. When you reach the corner, turn the block 90 degrees and repeat the process. Continue stitching around the entire star until you have stitched every block together.
Finish it off!
Now that you’ve sewn the center of the star, it’s time to add the points. Sew two more rows of squares, making sure to leave an opening at each end so you can turn the blocks inside out. The final step is turning the blocks inside out. To do this, simply flip them right side out and press lightly. You’ll notice that the seams line up perfectly, which means you won’t have to worry about matching up the seams when sewing the blocks together. Once the blocks are turned inside out, sew the sides together using a 1/4″ seam allowance. Press the seams open.
Now that you’ve finished making your star quilt, you’re ready to turn it into a wall hanging. Simply cut two pieces of fabric long enough to wrap around the back of the frame twice. Fold each piece in half lengthwise, then fold one end under and the other end over. Pin the ends together and stitch them securely. Trim the excess fabric from the edges of the frame. Turn the quilt right side out and insert it into the frame. Stitch the top edge closed.
If you want to hang your quilt on a wall, use a picture hanger to attach the hook to the back of the frame. You can find picture hangers at most hardware stores. Or, if you prefer, you can sew a button onto the back of the frame and thread a ribbon through it. Hang your new wall art anywhere you’d like! It was a pleasure talking to you, now it’s up to you. Crocheting is our passion. Until next time.
SEE TOO :Rose Garden Quilt Pattern