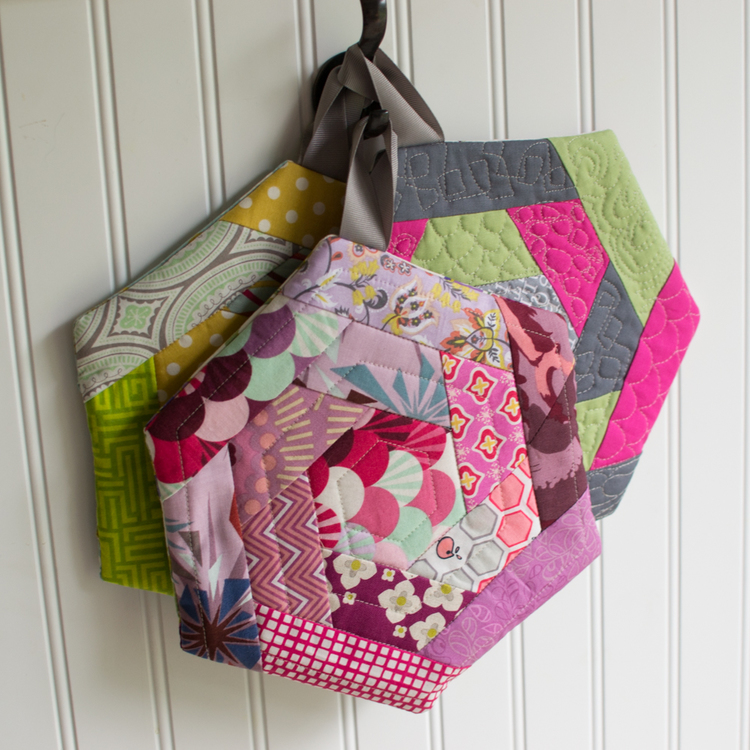
Log Cabin Hexi Potholders
Hello dear ones, this is Mommy, welcome, excited to start another amazing pattern?! Nothing better than joining the love of sewing and the love of cooking… how about sewing something to make the lunch / dinner table more beautiful family?! For example, a pot holder, being the perfect way to use fabric and batter remains and even better you can practice quilting. Plus, when you’re done, you’re sure to have a beautiful and useful item.
The good thing about this pattern is that it is quick and easy to make, you can sew several pot holders in one afternoon. you can choose to use mostly solid or printed colors (whichever you prefer!) but this is a project that can be done entirely with remnants of other projects, so you certainly don’t have to worry about it so much!! Ready to start?!How to use patchwork in decoration? ! I don’t know you, but who isn’t obsessed with the atmosphere of Grandma’s house? Decorations like this always remind me of warm, cozy bread baked in the oven. This is how I started to talk about this ancient, beautiful, and whimsical technology.
If you are not familiar with the term, it is a technique that combines flaps and tabs to form quilts, pillowcases, rugs, and curtains! In literal translation, patchwork is “fabric work,” a very old craft technique that you may have seen! How to use patchwork in decoration? In decoration, patchwork has been used to bring color and cheerfulness to a discreet and sober environment. In fact, patchwork has developed so much that today there is furniture made with this technique!

Besides being beautiful, it is also a sustainable technique because patchwork is made with fabric scraps and rags. In fact, any fabric can be a beautiful and colorful quilt or rug! When I say “any fabric”, I mean clothes, pillowcases, sheets, and curtains that are no longer in use at home! And for those who like to decorate boldly, you can even use patchwork techniques on the walls, you know? Glue a cloth piece by piece, and you will create a beautiful wall, colorful and full of history!
Copying at home isn’t difficult: all you need are scraps of cloth and white glue! You can also make a beautiful headboard, which is a great way to add life and color to the room without spending a lot of money! If you are good with threads and needles, you can make your own patchwork furniture. Is patchwork in decoration cool or not? Who doesn’t love quilts and pillow covers with this technique! I think it is a simple and nice way to bring life into an environment! And you, what do you think about using patchwork in decoration?
You will need:
- scraps of fabric
- a piece of Insul-Bright insulated batting at least 9” x 10”
- a scrap of cotton quilt batting at least 9” x 10”
- a piece of fabric at least 9” x 10” for the back
- a scrap of ribbon about 6” long
To cut the central hexagon, you will need a 2 ” side hexagon template. Use paper to mend 2 ‘hexagon paper. Printable template for you to download.
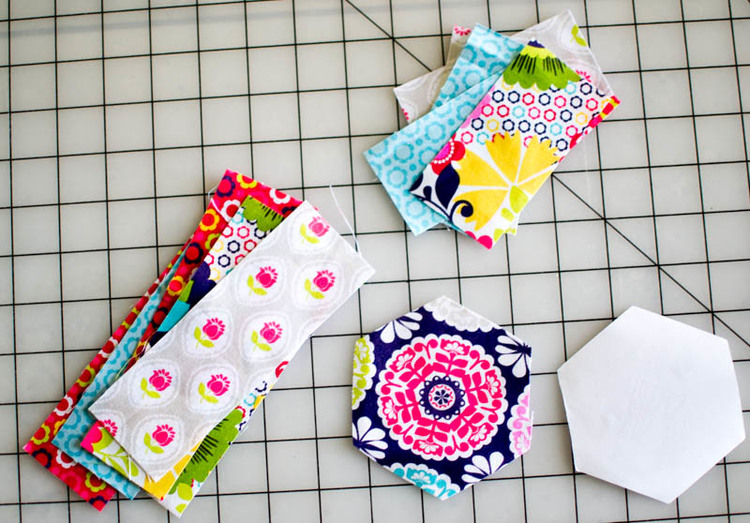
Cutting
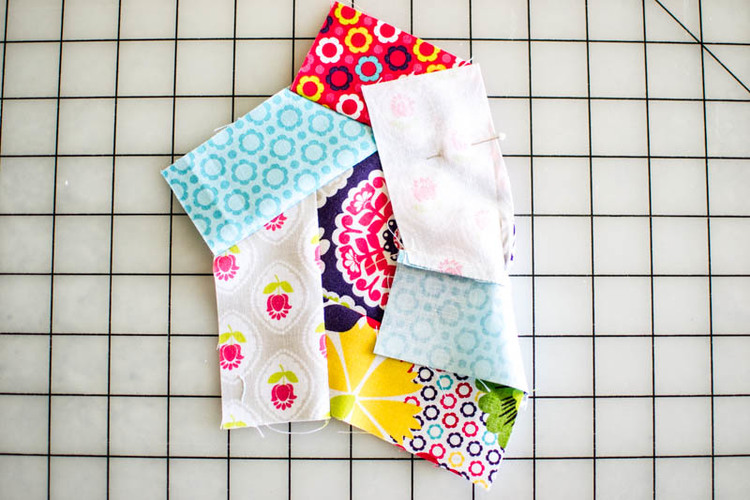
Cut your scraps into strips 2” tall. You will need:
- 6 strips 4” or longer (for the first round)
- 6 strips 6” or longer (for the second round)
Then cut out 1 hexagon with 2’’ sides (using a 2’’ sided paper piecing paper as a guide).
Sewing
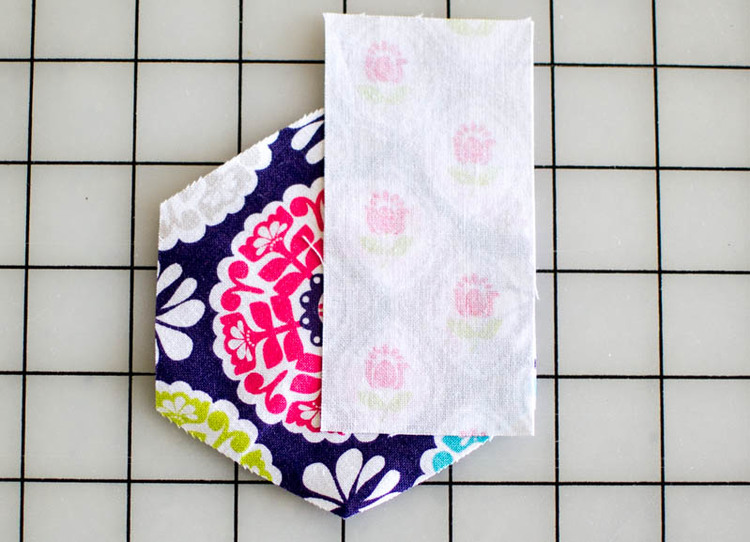
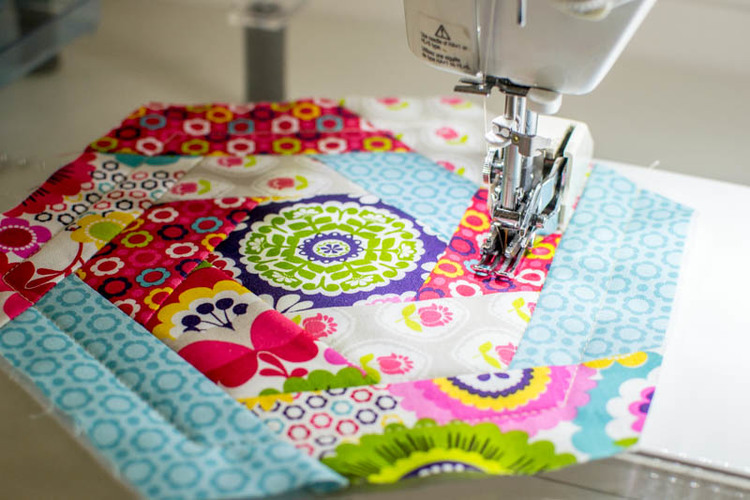
1. For the first round, use your shorter strips that are 4” long. Lay the first strip on any side of the hexi (right sides facing).
Line the bottom of the strip up with one corner of the hexi and let the rest hang off the top.
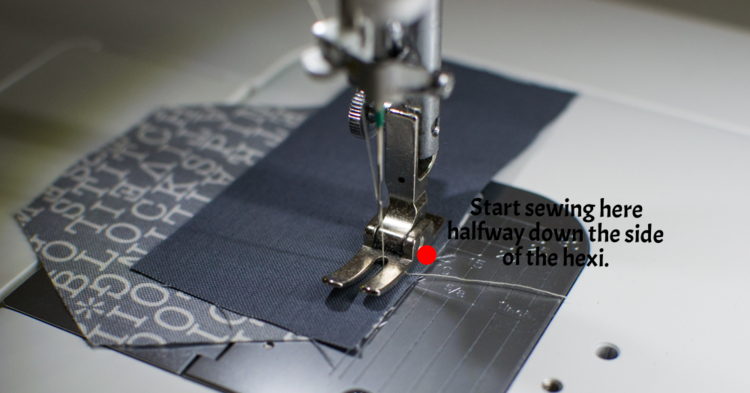
2. Start sewing half-way down the first side of the hexi with a 1/4” seam allowance. This is the partial seam. You will sew half of it now, and half of it later.

3. Open the fabric and press or finger press flat. Trim away the extra triangle of fabric to make a straight edge for the next strip.
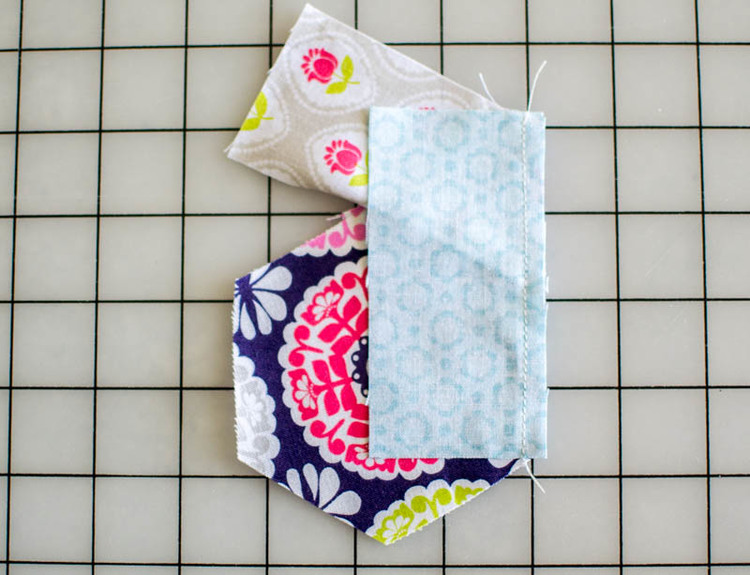
4. Working in a clockwise direction, place the second 4” or longer strip of fabric on the next side of the hexi. This strip should cover the hexi side plus the first strip. Sew with a 1/4” seam allowance.
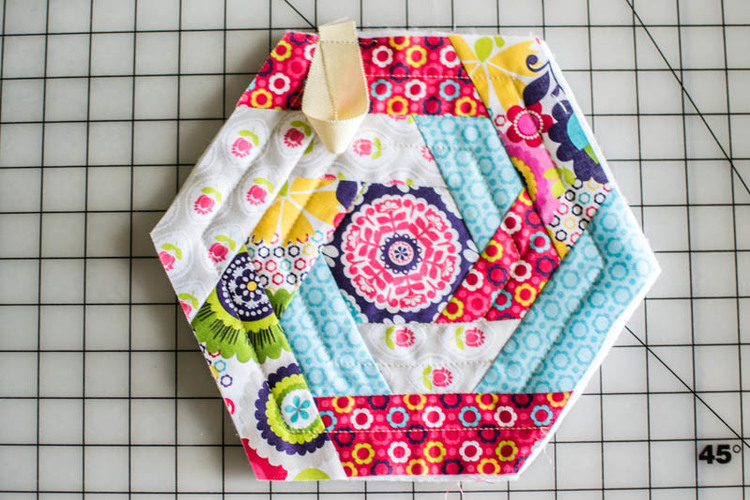
Press or finger-press the second strip open and repeat Step 3-4 until you have 6 strips sewn to the center hexagon. You’ll need to fold back the first strip to sew on the 6th strip.
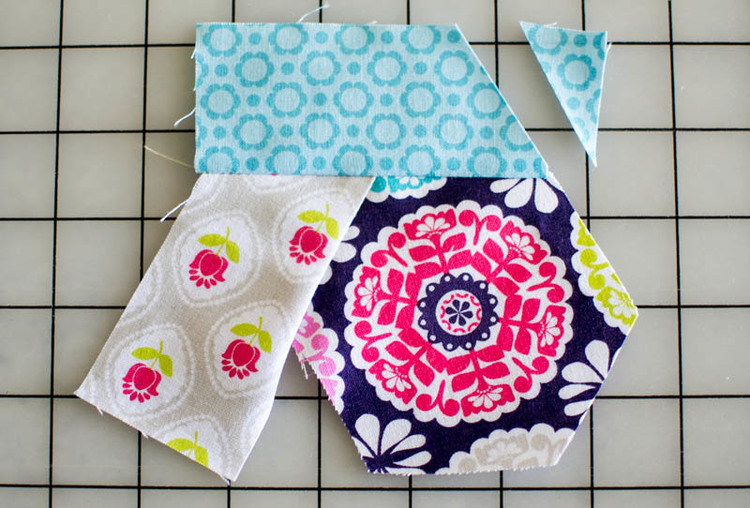
5. Fold back the first strip to trim away the little triangle from the last strip.
6. Pin the first strip over the last strip, taking care that it extends in a straight line. Stitch, ending your stitching in the same place where you began. Press.
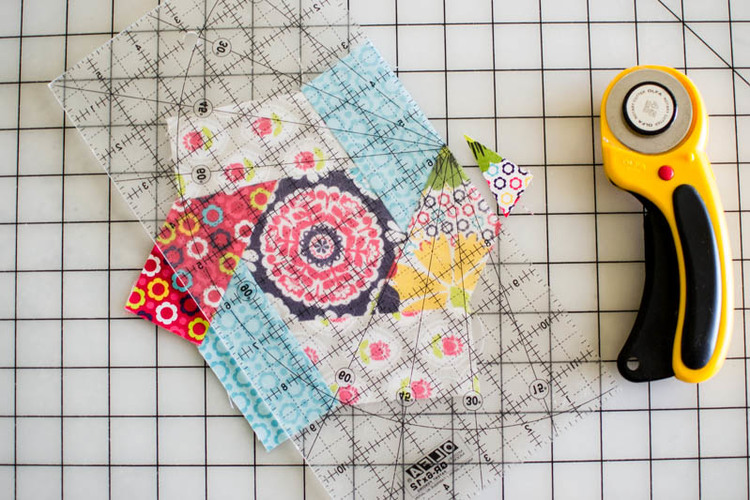
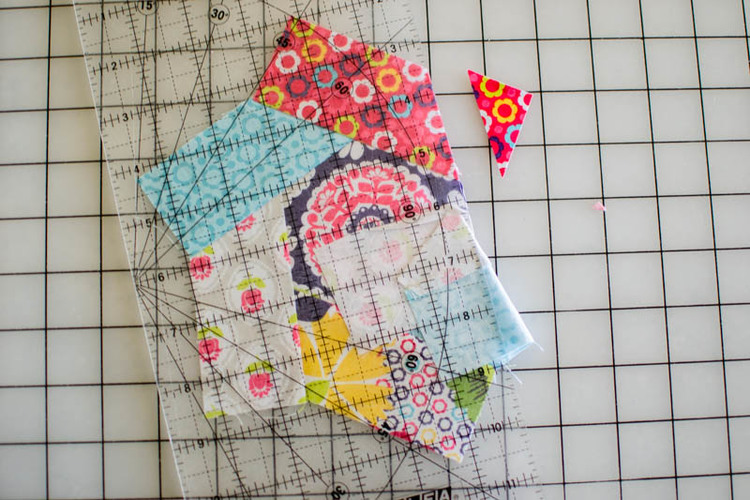
7.. Using a ruler and rotary cutter (or a pencil to mark the place to cut) trim away the extra fabric from each strip. You should be able to align the seam lines with the 1 3/4” mark on your ruler and slice off the top.
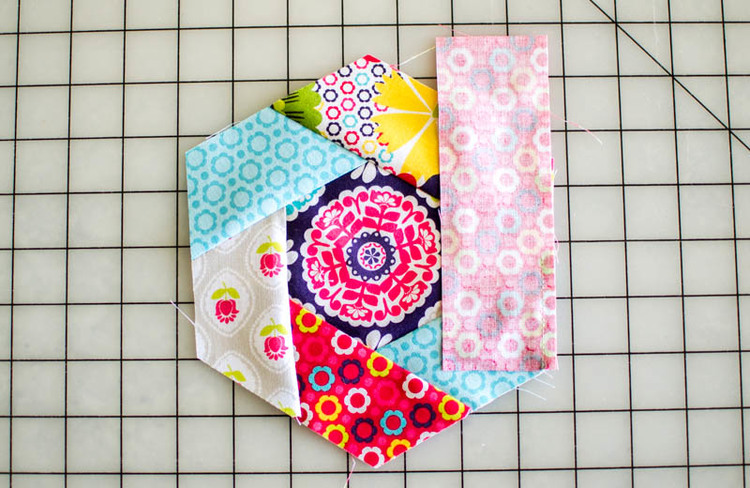
8. Repeat steps 1-8 with the 6” or longer strips for the second round.
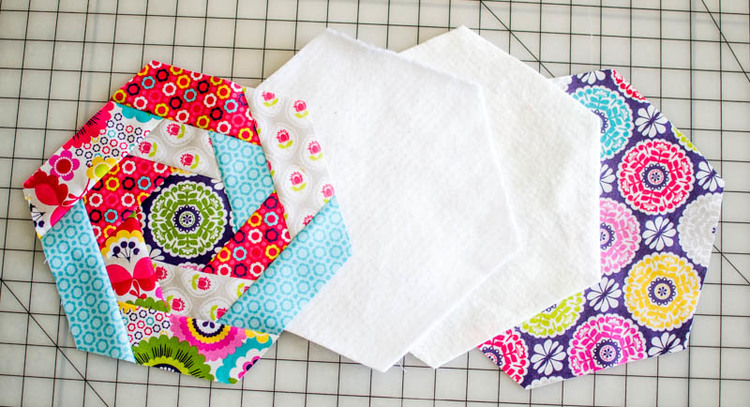
9. Use your finished ‘top’ as a pattern to cut out one backing, one piece of Insul-Bright, and one piece of cotton batting.
10. Stack the finished top on the Insul-Bright piece (shiny side towards the top) and ‘quilt as desired’ or no quilt if desired. In this one, why not sew in a spiral in the middle of each strip and sew ‘in the ditch’ along the inner seams.
11. When you are done quilting, fold the 6” scrap of ribbon in half and baste the ends near one corner of the potholder.
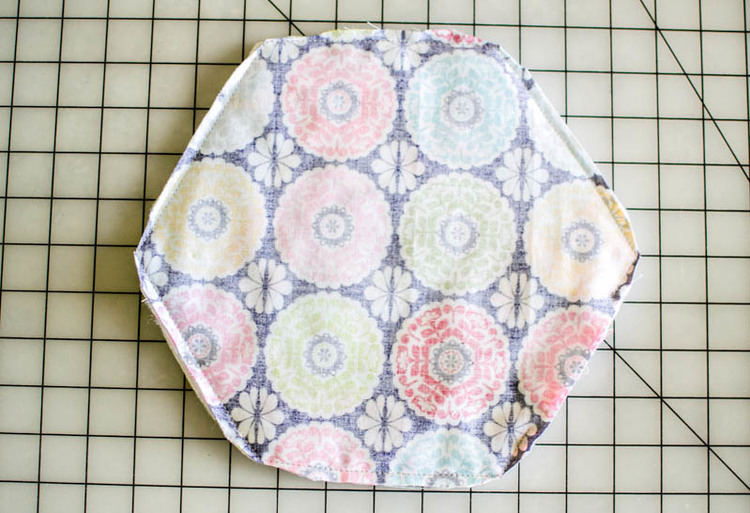
12. Stack the piece of cotton batting on the bottom (if you are using one) and the backing on top (right sides together). Pin in the corners. Stitch all the way around, leaving a 4” opening on one side (not the side with the ribbon). Clip the corners without cutting the stitching.
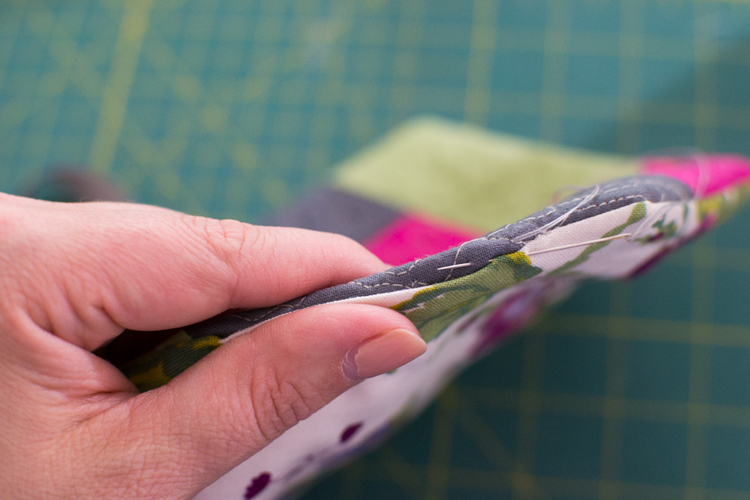
13. Turn right side out, pushing all of the corners out. Press. Hand sew the opening shut. Alternatively, you could topstitch all the way around the potholder to close the opening. If you like the swollen edges, choose not to weigh.