Fireworks Blocks Quilting
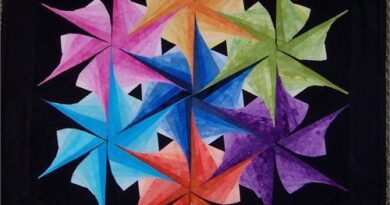
Hello my dears, this is Mommy speaking, and we are here again, talking with much love to you. Very happy that you are enjoying our blog. Today we will present an incredible pattern for you. This quilt is an amazing model with versatile blocks that can be changed, reversing any three of the same colors around, achieving a totally different look. The fireworks Blocks Quilting is the perfect choice if you want to make a larger block rather than several smaller blocks. The quilt block itself does not contain over-sized pieces, as some larger blocks do. There are just more pieces in the block. But, the bonus is that you need to make fewer blocks for your quilt. Very white because they make the bright colors appear, and the blocks are large enough to show demanding cuts, putting your favorite prints on display. For beginners, practice half-square triangles and flying geese. It’s a fun and interesting block to do. Adjusting the squares from 2 ½ “to 2 renders a block smaller than 12, which is equally fun to play. Do not panic because we will learn a way to not waste so much fabric, just follow exactly the cutting and sewing instructions (even if the remains are always well used here). The “no waste” method is good for joining the remaining part of the block. Modified just a little of the “No Long Waste Half Triangles” method by cutting the pieces 1/4 “more than necessary – cutting the 7.25” x 2.5 “white piece and the 3.25″ x 2 ” 5 “This way you get a full seam allowance of 1/4” when you cut the pieces. With this method you can still make a beautiful Fireworks fit a little faster and use less precious fabric than the standard requires!
Fireworks Quilt “No Waste” Corner Block Tutorial: This method causes the four “corner blocks” to be required for a Fireworks quilt block. CUT: Of “accented” fabric (of the color you prefer): Two rectangles 4.5 “x 5.25” White fabric: four rectangles 2.5 “x 3.25” Of “main” fabric (green, in my case): Four squares of 2.5 “x 2.5”
SEW: Start by chain-piecing the 4 main-coloured squares onto each of the 4 white rectangles, right sides together, matching the 2.5″ sides. Press seams open.
Arrange the pieces in two sets of two as shown below, with the coloured squares at opposite ends from one another. Place RST and sew each set together. Press seams open. You will have two rectangles that look like this (but sewn together in the middle):On the wrong side of each piece, use your clear ruler to draw two lines. Align your ruler through one corner of the rectangle, right next to the corner of the coloured square, and 0.5″ from the opposite corner, as pictured below, and draw a line using a pencil or water soluble marker. Repeat to draw the second line 0.5″ away from the first, through the other corner of the rectangle and passing just beside the corner of the other coloured square. You should now have two blocks that look like this:
With right sides together, lay this block on top of the “accent” fabric rectangle. They should be exactly the same size (which is why you can’t see it in this picture). Sew a seam along each of the lines you’ve drawn. Then, line up your clear ruler in between the two lines, leaving a 1/4″ seam allowance on either side. Continue to make the blocks and you’re done!!
SEE TOO :Woodland Foliage Quilt


