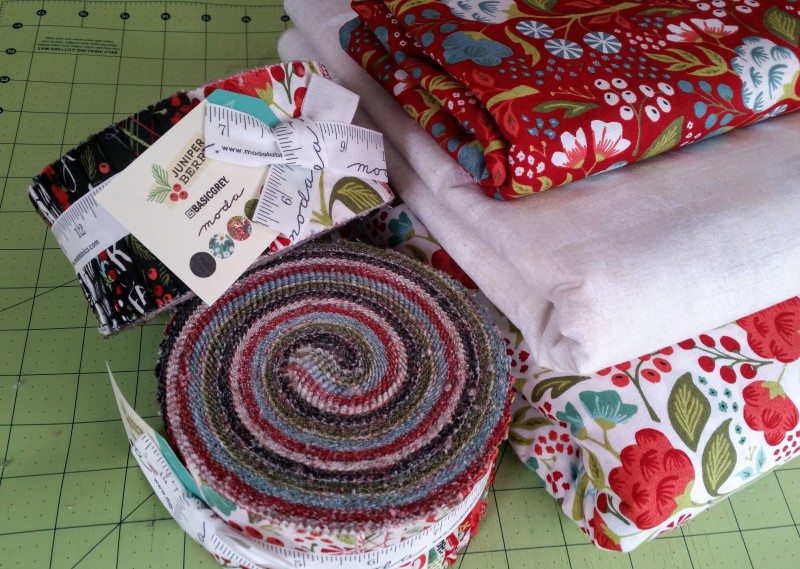
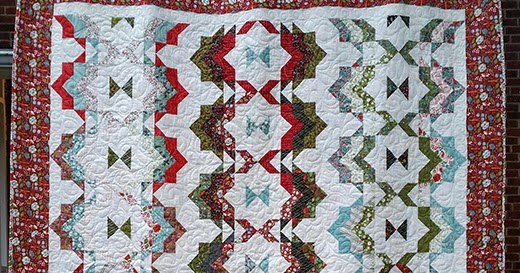
Ribbon Candy Jelly Roll Quilt Pattern Tutorial
A jelly roll quilt pattern tutorial using ribbon candy fabric. This is a great way to use up scraps of ribbon candy fabric! The finished size is approximately 40″ x 60″. This project uses a lot of different techniques including piecing, applique, embroidery, and more! I love making these quilts because they are so easy to make and fun to do with my kids. They also make great gifts for friends and family. The first step is to cut the fabric into strips. You want to use at least three fabrics for each strip. For example, if you are using four fabrics, then you would cut them into eight pieces. Next, sew the strips together end to end to form a long piece of fabric. Once you have sewn all the strips together, press the seams open. Now you can lay the strips flat and stitch around the edges of the strips. When you get to the corners, turn the corner and stitch back across the seam. Continue sewing around the entire quilt until you reach the other side.
After stitching the strips together, you can now add the appliques. To create the ribbon candy jelly rolls, you will be adding a row of appliques every 2 1/2 inches. Start by placing one of the strips right sides together with the next strip. Sew around the edge of the two strips. Repeat this process until you have stitched all the strips together. Press the seams open. Now, place the ribbon candy jelly roll template on top of the strips. Trace around the template onto the strips. Cut out the shapes from the strips. Use a rotary cutter to cut out the shapes. Place the ribbon candy jelly roll templates on top of the strips again. Trace around the templates. Cut out the shapes. The quilt measures approximately 60 x 80 inches. You can use whatever colors you want for the jelly rolls. For this project, I used red, yellow, green, blue, orange, purple, and pink.
Download the free printable PDF file from my website: This is a free downloadable PDF file of the ribbon candy jelly roll quilt pattern. It includes instructions for cutting out the pieces as well as how to sew them together. You will need to cut out the following pieces:
- 2 1/2″ x 3 1/2″ rectangles (for the blocks)
- 4 1/4″ x 5 1/4″ strips (for the sashing)
- 6 1/2″ x 7 1/2″ strips (for the binding)
The ribbon candy jelly roll quilts are fun to make because they use scraps of fabric instead of piecing each block separately. And if you want to add some extra pizzazz to your quilt, you can choose different fabrics for the sashing and binding. For example, you could use solid colors for the sashing and contrasting prints for the binding. Or you could go with a rainbow effect by alternating between two different shades of blue for the sashing and one shade of blue for the binding. The ribbon candy jelly roll quilt pattern is one of my most popular patterns. It’s easy to sew and fun to create. You’ll love making this cute quilt for yourself or for a special friend. If you’ve ever wanted to try your hand at sewing a jelly roll quilt, then this free download is for you. It includes step-by-step instructions and a downloadable PDF file. Just follow the directions and you’ll be creating a beautiful ribbon candy jelly roll quilted pillow cover in no time.
Ribbon candy jelly rolls are one of my favorite projects because they’re easy to sew and look really pretty. You can use whatever fabric you want, and there’s no right or wrong way to create them. The key is to keep things simple and focus on the details. For example, if you’re using a solid color fabric, choose a coordinating thread color to match. Or, if you’re using multiple fabrics, pick colors that complement each other.
If you’ve never sewn before, then this project might be a little intimidating at first. However, once you get started, it’ll become second nature. Just follow the instructions carefully and you’ll end up with a beautiful quilt that you can proudly display in your home. The pattern includes detailed instructions for making the quilt top, piecing the blocks, and finishing the edges. You’ll also find helpful hints throughout the tutorial, such as suggestions for using fabric scraps and other techniques that will help you create a unique piece of art. If you’re looking for a fun project to try during the holidays, then look no further than this adorable ribbon candy jelly roll quilt. With just a few basic sewing skills, you can whip up this sweet little quilt in less than two days.
The first step is to cut out the fabric pieces for the blocks. For each block, measure and mark off four equal sections. Cut one strip of fabric 1/2 inch wide and long enough to cover the entire length of the marked section. Repeat this process until you’ve used up all of the strips. Next, fold the fabric into quarters and sew the short ends together using a zigzag stitch. Once you’ve sewn the sides together, turn the quilt right side out and press flat. Now, you’ll be ready to add the ribbon candy jelly rolls. To create the jelly rolls, simply cut the ribbon into 2-inch lengths. Fold the ribbon in half and place it inside the center of the quilt. Sew the ribbon around the edge of the quilt, leaving a 3-inch opening at the top. When you reach the end of the ribbon, tie a knot and trim the excess. Finally, use a hot glue gun to attach the ribbon candy to the back of the quilt.
 SEE TOO : Several Small Trips Quilt Pattern Tutorial