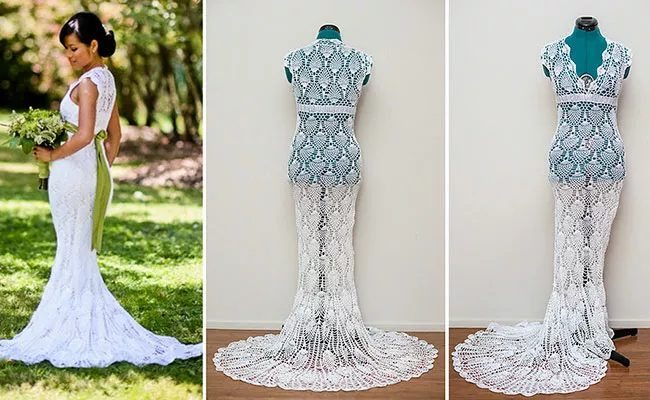
Wedding Dress Crochet Pattern
Do you want to create a beautiful and one-of-a-kind crochet wedding dress for your special day? Whether you’re a beginner or experienced in crochet, this guide provides step-by-step instructions and pattern ideas to help you design the perfect wedding dress.
Develop a Sketch for Your Crochet Wedding Dress Pattern.
Start designing your crochet wedding dress with a sketch. This will make the entire project easier by helping you visualize the gown and determine the stitches, pattern, fabric, and color combination you’d like to use. Sketch as many ideas as possible, then narrow down your design to one final look that features a bodice style, sleeve type, length of train, neckline shape, etc., that best reflect your desired finished design. Keep in mind, the more intricate and delicate your crochet project is, the slower it will take to complete.
To create a unique wedding dress design, you can incorporate elaborate details like lace or 3D appliques into your pattern. Taking advantage of large openwork areas or unusual stitches will also give the dress a special touch. Experiment with different materials like mercerized cotton yarn for an elevated look that’s lightweight and breathable for summer days. Once you have finalized your sketch, use it as a visual guide when creating your crochet pattern. Draw the details of your dress pattern onto the sketch along with measurements, patterns, color changes and any embellishments like cutouts or appliques.
Make sure to measure twice and double-check each measurement before moving on to the next step. As you create your pattern outline, also leave room for adjustments so that it can be customized for different body types. Finally, thoroughly document all changes that are made during the design process so you can refer back to it later in case any further modifications need to be made.Once you have completed your outline sketch, it is time to transfer the pattern onto graph paper. Graph paper is perfect for a crochet wedding dress pattern because it will show the full design grid and calculation of the pattern.
This will help you capture each detail more accurately and give you an exact visual representation of how the finished dress will look when done. Use the measurements from your sketch and mark off on each square where stitches should be placed. You can also use different colors to signify color changes, increases or decreases. Additionally, if there are any embellishments or accents needed for your dress, those too can be included in this graph outline. When the graph paper outline is complete, count the squares to measure out how many stitches you’ll need.
You can also further refine your design and add notes of special techniques or techniques that will be used with certain parts of the dress. From here, you can use a hook and pre-selected yarn to make a swatch or sample of what the end result will look like before starting on the full dress. After everything is complete, your sketch has been transferred to graph paper, possible changes have been made and you’ve tested it all with a hook and some yarn…it’s drive time! Time to work those creative fingers and bring your dream crochet wedding dress pattern to life!
Armed with your sketch, you are ready to start making the necessary calculations that will turn your design into a practical pattern. Measure out how wide and long each piece should be, determine the best stitch patterns and count up all of those need stitches. You must ensure that the total grain count of the pattern is accurate by multiplying the width times the length to find total knit or crochet squares needed. For example, if you got 7 squares across and 10 down (7×10), you would need 70 stitches or 70 crochet/knit blocks to cover this area in your pattern. From here, it’s time for you to lace up those crochet needles and let yarn do its thing!